|

- 帖子
- 3961
- 精華
- 8
- 威望
- 113
- 魅力
- 0
- 讚好
- 0
- 性別
- 男
|
2#
 發表於 2005-9-25 10:41 PM
| 只看該作者
轉貼DSCANS嘅教學連圖解:Step by Step guide
1. Scan at 600 dpi, use PS to downsample to 300 dpi
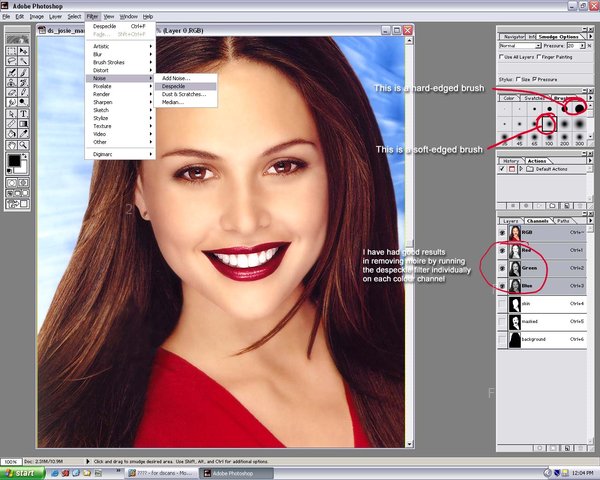
2. Run despeckle filter once on each colour channel (red, green blue)
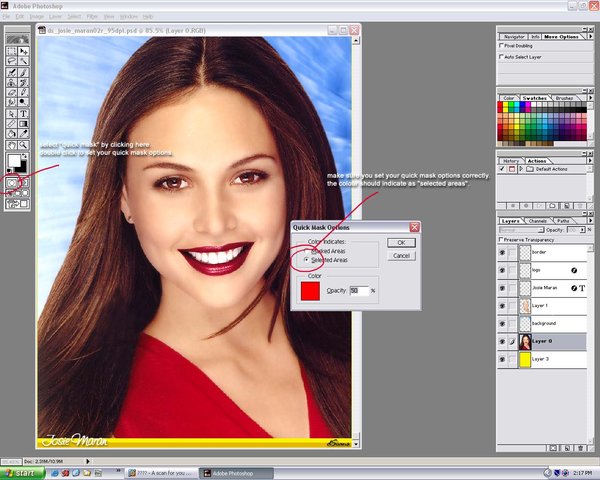
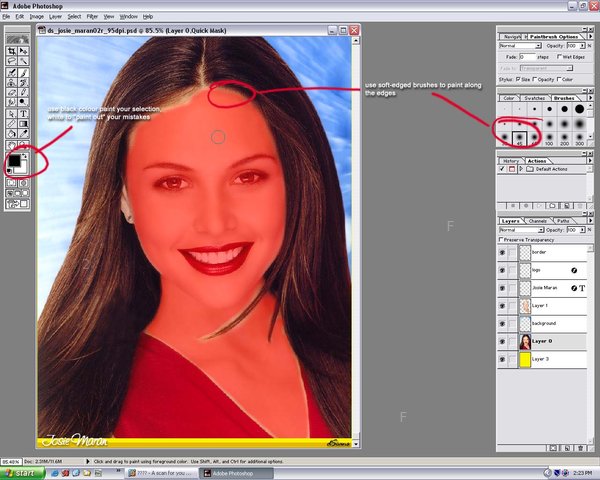
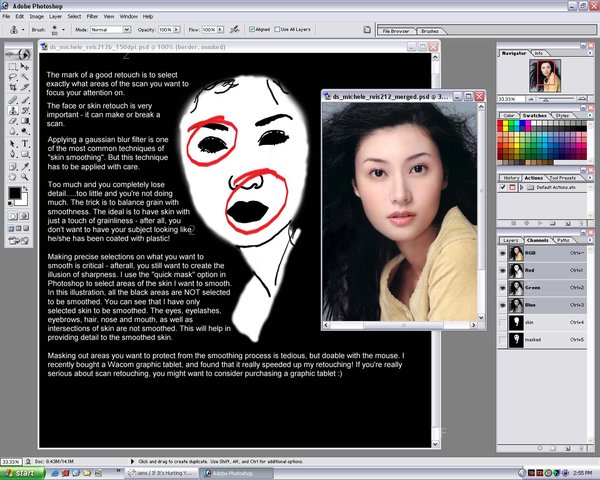
3. Use the quick mask tool to paint in areas of skin your want to smooth. In quick mask, use black colour to paint in your selection, white colour to deselect. Use a soft brush to feather at th edges!
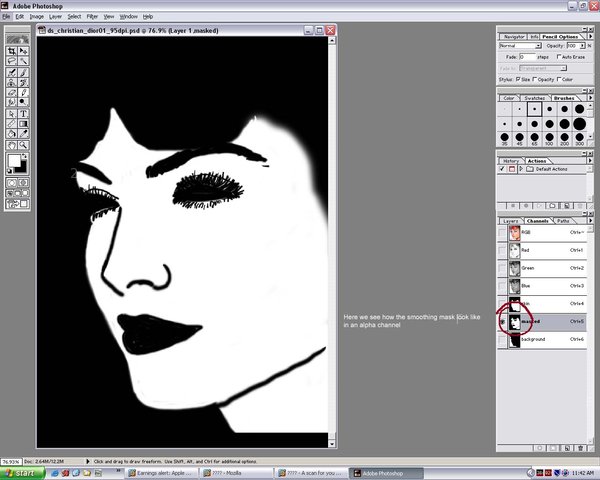
4. Save your selection as an alpha channel. I call this selection "skin".
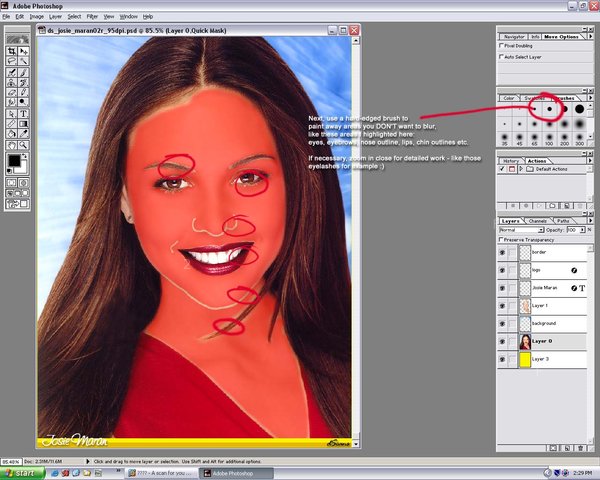
5. Next, use a hard-edged brush to paint away areas you don't want to smooth, like eyes, eye lashes, outline of the nose, lips, and other skin creases etc.
6. Save this selection as an alpha channel. Name this selection "masked".
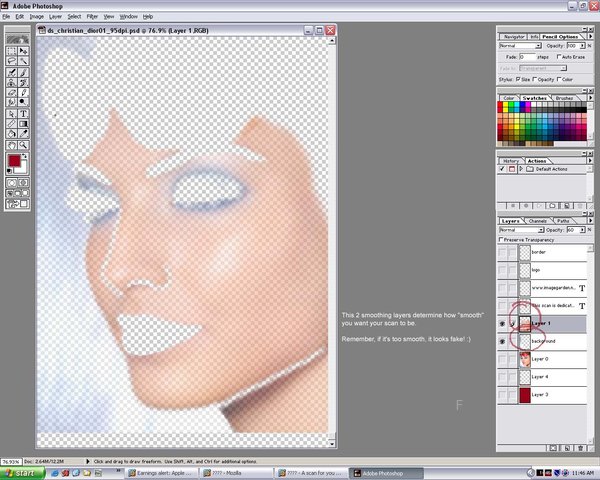
7. With the masked selection active, float in to a new layer (CTRL-J).
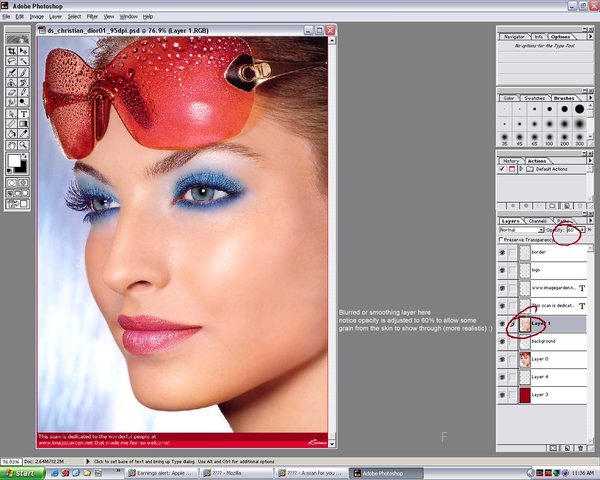
8. Use the gaussian blur on this new layer (radius 14 pixels). Quite a high setting, but play with the settings till you get the effect you want. Usually, the bigger the scan, or the bigger the skin area, requires a higher guassian blur setting.
9. Set opacity of the blurred layer to 70%. Check to see if effect is pleasing. (Do not overblur and kill detail!) The best effect is still to see a little of the skin detail, like pores, etc.
10. Save your work and downsample to 95dpi.
After the steps above, this is what you get:
Step by Step - pt 2
Now that your pic is at a smaller size, it's time to run unsharp mask to bring out the details!
1. I ran unsharp mask at settings (25%, .radius 0.5 and threshold 0%) 4 times. Remember not to oversharpen!
2. Next, I loaded in the "skin" selection, and ran further unsharp mask at this settings 1. 25%, radius 0.5, threshold 0% 2. 25%, radius 0.3, threshold 0%) 3. 15%, radius 0.3, threshold 0% 4. 8%, radius 0.3, threshold 0%
3. It's better to run the unsharp mask filter multiple times at smaller settings rather than to run it once at a large setting.
4. Select the background behind the head, and floating it on a new layer and ran a guassian blur filter on it to smoothen the grain arising from the sharpening process.
4. During the sharpening process on the base layer, you'll find that the 2nd blurred layer is nicely masking the grain of the skin arising from the sharpening
5. As an illustration, here's what the sharpened pic looks like without the smoothing layer:
Step by Step - pt 3
Step back and take a look.
1. decided to bring out a little more skin detail by reducing the opacity of the blurred skin layer from 70% to 65%.
2. Added in text, logo and border.
3. Finished! |
|